Xiaomi launched its first Android One smartphone, the Mi A1, in 2017, which was originally launched in China as the Mi 5X. Subsequently, the Mi 6X became the Mi A2 in India and the third generation Android One phone from Xiaomi, the Mi A3 is actually a CC9e smartphone launched in China. However, the Mi A3 is only equipped with an HD+ screen, although it is Super AMOLED.
Moreover, compact phones are very rare in 2020, making the Mi A3 one of the best compact phones available. Once again, Xiaomi slows down the adoption of Android 11 with this compact, high-performance phone. Thanks to the developers who use this excellent device to create a wide range of custom ROMs.
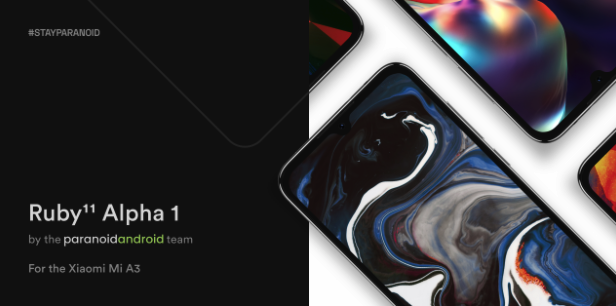
In this post, we have shared a step-by-step guide on how to install the Paranoid Android ROM based on Android 11 in Mi A3.
Credits: We would like to thank the developers and collaborators of Paranoid Android for the Mi A3, Mauronofrio for the development of TWRP Recovery for the Mi A3 and thecustomdroid.com for the guide.
Disclaimer: If you unlock the bootloader and the ROM flashes, the warranty of your Xiaomi device may be void, We at installonrot are not responsible for any damage or loss of your device.
Download Links:
- Download TWRP Recovery for Mi A3
- Download Paranoid Android ROM
- Download ADB software (For Windows) / Android zip file (For Mac)
Pre-Requisites:
- Extract the Android zip file and place the folder on your desktop.
- Open Terminal app and navigate to the location where the files are extracted by using cd Desktop/Android location
- Now Type ./ADB-Install-Mac.sh
How to flash Android 11 based ROM on your Mi A3?
Step 1: Downloading the flash image and switching
- Download the latest TWRP recovery image and installation zip files for Xiaomi Mi A3.
- Download a bootable image for the current version of the software installed on your phone. After installing the software version V11.0.23.0.QFQMIXM, download the stock boot image of V11.0.23.0.
- Move the boot and recovery img files to the folder on the PC where the ADB and fastboot binaries are installed (e.g. C:\platform tools).
- Transfer the downloaded TWRP installation zip file (e.g. twrp-3.3.1-17-laurel_sprout-Installer-mauronofrio.zip) to your phone’s internal memory.
- Now switch off your Mi A3 and start it in Fastboot mode.
- Connect the phone while in Fastboot mode to the computer using a USB cable.
- Launch the command line window or Terminal on your computer.
- Enter the following command to ensure that your computer can detect your Mi A3 during quick startup:
fastboot devices
- Now flash the boot image in the currently active slot with the following command:
fastboot flash boot stock_boot_x.x.x.x_mi_a3_xxxxx.img
Example: fastboot flash boot stock_boot_10.3.13.0_mi_a3_global.img
- After flashing, check the active slot of the phone:
fastboot getvar current-slot
- The command must indicate the currently active lock (assuming it is a lock; we call it the original lock).
- Replace the active lock with the currently inactive lock (say b; we call it the new lock) with the following command:
fastboot –set-active=b
- Do not unplug or switch off the phone.
Step 2: TWRP Flash memory repair on Xiaomi Mi A3
- Flashing of the TWRP recovery image on the new A3 slot of the Xiaomi Mi :
fastboot flash boot twrp-recovery-image.img
Replace twrp-recovery-image.img with the real name of the recovery you are using. For example:
fastboot flash boot twrp-3.3.1-17-laurel_sprout-Q-mauronofrio.img
- Now it is important that you start the Xiaomi Mi A3 directly in TWRP recovery mode. To do this, type the following command while holding down the Volume Up button until the TWRP startup screen appears:
fastboot reboot
- Enter your PIN/password on the lock screen when you are prompted to allow TWRP to decrypt the [/data] partition (internal memory).
- Drag the slider when prompted to allow changes.
- Press the Install in TWRP button and select the TWRP installation zip file (e.g. twrp-3.3.1-0-installer-laurel_sprout.zip).
- Finally, slide to confirm the flashing and to make the TWRP Installation zipper flash and install TWRP Recovery permanently on the Xiaomi Mi A3. The process may take a few seconds. When you’re done, don’t restart the phone. Proceed to the third and final step of the procedure.
Step 3: Go to the original location and install the paranoid Android
Now, before loading the Mi A3 into the system, it is important to reconfigure the lock as it was originally active (the original lock). Before that:
- In TWRP, go to the Reboot menu.
- Touch the originally active time lock (e.g.: a) to gain access.
- If the active slot is configured correctly, press Clear Data and Format.
- Select Delete again in TWRP and switch to Factory reset.
- Now copy the PA-ROM packet into the root directory of the Mi A3 – install the PA-Zip packet with TWRP Recovery.
- Once the installation is complete – Data Format click Swipe → Data Format → Enter Yes.
- Reboot your system – When prompted to install the TWRP application, press Do not install. Your phone should now boot into the operating system.


