
Samsung introduced the new Bixby 2.0 in the new Samsung Galaxy Note 9. The Bixby 2.0 was promised to be better than Bixby 1.0 which launched last year. The Bixby 2.0 looks almost similar to Bixby 1.0 but has a lot of features missing. Fortunatley we discovered a guide on XDA that allows you to remap the Bixby 2.0 and here are instructions on how to install and use the two best remapping apps for Bixby 2.0 on the Galaxy Note 9.
Methods to remap Bixby 2.0 for Samsung Galaxy Note 9.
- Button Mapper
- bxActions
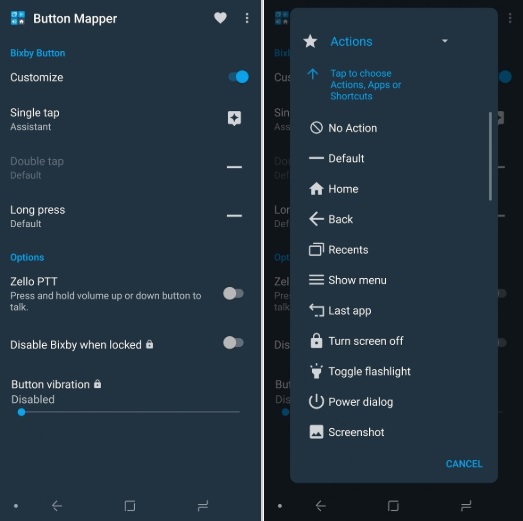
Button Mapper
The button mapper option lets you remap every button on your phone. So we’ll take that as an advantage and with its help, we’ll remap Bixby button on the Galaxy Note 9. The only drawback here is this button is set by scripts and every time you switch off or restart the device is set back to the original. So you’ll need to set it every time as you switch off or restart your Galaxy Note 9.
Steps to set up Button Mapper:
- Install Button Mapper.
- Set up ADB on your computer.
- Enable ADB by going to Settings > About Phone > Software Information and tap build number 7 times. Once you do this enter your password and go back twice. You can enter the developer options menu now. Just toggle the USB Debugging switch to enable ADB.
- Open the Button Mapper app, at the bottom of the window, there will be a popup asking you to enable accessibility services. You then just enable accessibility services for Button Mapper.
- Select the Bixby Button option at the top of the app. Then click the customize button. Once you do this you will need to run the following commands:
adb shell sh /data/data/flar2.homebutton/keyevent.shAnd then
adb shell sh /data/data/flar2.homebutton/keyevent.sh -d - You will need to run this second command every time you reboot your phone. This will also disable Bixby Voice. If you don’t disable Bixby Voice, it will open every time you press the button along with what you have it remapped to. You can re-enable Bixby Voice with the following command:
adb shell sh /data/data/flar2.homebutton/keyevent.sh -e. - Now you select whatever option you want to use in the single tap and long press menus.
bxActions
The bxActions app is remapping the Bixby button starting from the launch of Bixby on Samsung Galaxy S8 and S8+. It is pretty reliable for remapping Bixby on the Samsung Galaxy Note 9. The only problem here is the installed Bixby Voice, so there could be some compatibility issues with that.

Steps to set up bxActions:
- Join the open beta for bxActions then install the app.
- Install ADB on your computer.
- Enable ADB by going to Settings > About Phone > Software Information and tap build number 7 times. Once you do this enter your password and go back twice. You can enter the developer options menu now. Just toggle the USB debugging switch to enable ADB.
- Open bxActions and follow the prompts to give it the permissions it needs.
- Select the Bix button options and then click the red box that says “please unlock permissions using a PC”
- Run the two commands:
adb shell pm grant com.jamworks.bxactions android.permission.WRITE_SECURE_SETTINGS adb shell pm grant com.jamworks.bxactions android.permission.READ_LOGS - Once you do this close and re-open the app.
- Now select the option you want to use to remap Bixby button.
Note: Button Mapper seems to be a bit better in use because it disables Bixby Voice and remaps it. The downside is that you will have to run the ADB command every time you reboot your phone. And If you don’t want to have to run the command every time you reboot your phone, go with the bxActions app. Also, the bxAction is under development so if you find bugs you can report it to them.
If you don’t know how to set up the ADB and its function. You can follow the instructions provided by XDA Team. Follow this guide to get it installed ins simple setps.
Download – Button Mapper
Download – bxActions
Source – XDA Developers


")


")
